 I’m a huge fan of 2D games, and the only major system that still has mostly 2D games actively developed for it is the Game Boy Advance (although that won’t be the case for much longer, as the GBA fades into its sunset years). When Nintendo announced their Game Boy Player for the Gamecube a few years ago, I was incredibly excited. Here was a chance to play completely new 2D games on a TV instead of a tiny screen — it would be like the 2nd coming of the Super Nintendo (SNES). But playing those games on the Gamecube’s very modern controller is not nearly as appealing: the analog stick is imprecise and hardly ideal for non-analog-controlled games, and the Gamecube controller’s built-in D-pad is small and placed inconveniently and uncomfortably out of the way. (Just as a note, before I go any further: it’s possible to play GBA games on the Game Boy Player using the GBA itself as a controller, connected through the GBA-GC link cable — the original model GBA feels best for this task).
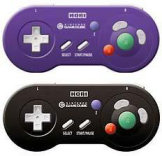
Luckily, there is a nice alternative to controlling your your GBA games on the GC. Enter the Hori Digital Pad, a sleek, simplified version of the GC controller with a form-factor that obviously borrows a lot from the beloved official SNES pack-in controller. It’s about the same size and shape as a SNES pad, but the Hori Pad has raised “finger-grips” (for lack of a better term) on its bottom (toward the left and right sides of the controller) that actually make the pad more comfortable to hold for long periods of time. The most major and noticeable difference between the Hori Pad and the regular Gamecube controller is the complete and total lack of the GC’s two analog sticks. Also, the left and right shoulder buttons are not analog, but digital equivalents of the original (equivalent to pushing original GC shoulder buttons all the way down). Four of the face buttons share a nearly identical layout to the official GC controller: X, Y, B, and A. However, the Z button, normally placed on the right shoulder of the official GC controller (quite awkwardly, I might add), has been tacked on — almost as equally awkwardly — to the left of the main face button area. In the middle of the controller there are SNES-style “Start” and “Select” buttons. The “Select” button, not being present on the GC controller, is apparently mapped to the regular “Y” button (this controller mapping is default for the Game Boy Player, so it works out well).
I’m not quite sure I like the button placement on the Hori Pad. I find myself regularly wishing that its buttons were reconfigured to be equally sized, spaced, and round like on a SNES pad. The huge size difference between the B and A buttons on the pad makes for some weird playing on some games that obviously weren’t designed with this layout in mind (i.e. all GBA games). However, I understand that some people actually prefer this pad to play GC fighting games, so perhaps the similar button layout to the GC pad is less confusing. Then again, I think the weird GC button layout might be what makes fighting fans not like the GC very much in the first place. So all in all, I’d say it’s a negative feature of this pad to have duplicated the size, shape, and layout of the GC’s X, Y, B, and A buttons.
But with that out of the way, I really can’t think of anything else negative about this product. Upon holding it in your hands and actually using it, it becomes immediately obvious that this is a high-quality pad with high production values and excellent craftsmanship (as far as 3rd party controllers go, anyway). The buttons feel good to press and are responsive and accurate (it’s nice not having worn-out conductive rubber buttons for once). The shoulder buttons are a tad bit mushy, but I feel it’s not bad enough to really hold it against the product. The pad feels really good in my hands, has a sturdy construction, and its cord length is adequate (about six feet). All in all, I’d say this is a great product and I highly recommend it for anyone who spends more than a few hours playing Game Boy Advance games (or any retro games — many of which are now available in collections) on their Gamecube. The pad itself can be a little hard to obtain, as I don’t think it’s officially distributed in the US. You might have to get it through a game import place like National Console Support (Hori Digital Pad, $22 US) or Lik Sang. But for $22 (at NCS), I think it’s really worth it. Stock up now before they disappear forever and you kick yourself (I have a spare one in the wings for the future, if my first one ever wears out). And no, I’m not getting paid any money to say that. I really like the pad that much.
| The Skinny: Hori Digital Pad (Gamecube) |
| Good Features: |
Accurate, responsive buttons with good tactile feel, great classic form factor, sturdy construction, nice cord length, relatively inexpensive. Great choice for playing retro games on your Gamecube. |
| Bad Features: |
Duplicates awkward face button layout of the official Gamecube controller (X,Y,A,B buttons). Shoulder buttons a tad mushy. |
VC Rating:
(10 Being Best) |
[ 9 out of 10 ] Shiny Marbles |

 You may remember
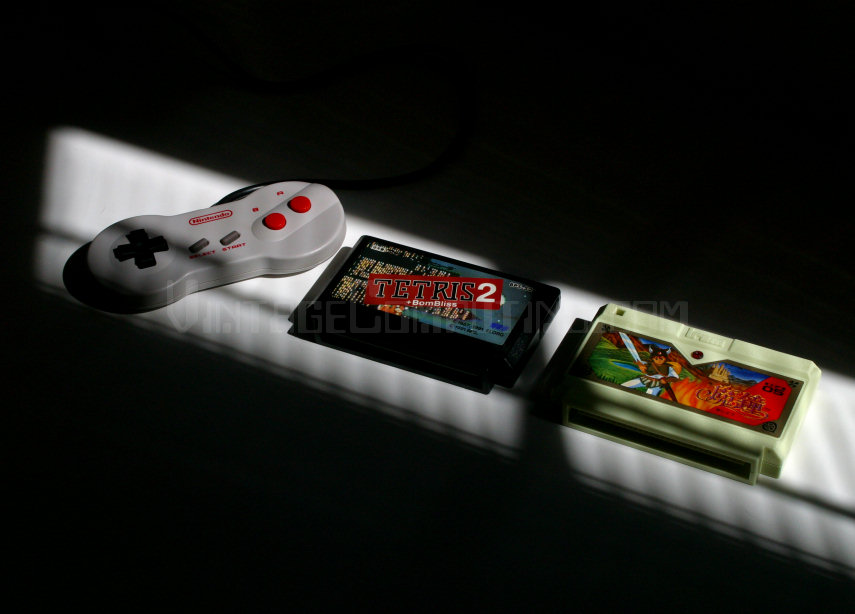
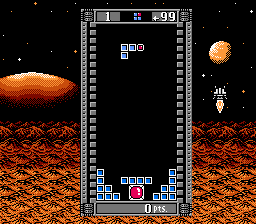
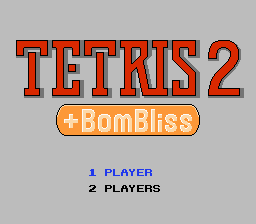 So what else is new? A few things. First of all, you must drop everything and play Tetris 2 + Bombliss. This cart contains my new official favorite version of Tetris, and it comes with a bonus Tetris-like game called Bombliss. This particular version of Tetris was never released in the US, so not many American gamers probably know of it (and no, it’s not Tengen’s Tetris). And for some reason, despite the number “2” in the title, it seems to be the same ‘ole Tetris that we know and love. This version was developed by Bulletproof Software, has great graphics, smooth gameplay and controls, and relatively relaxing music (instead of relentless, frantic Russian marches that typically make me want to jump off a bridge when under level-11 duress). Bombliss, also included, is a game played with Tetris-like pieces, except that some of the pieces contain — surprise — bombs. Every time you complete a horizontal line, all the bombs in the line explode. Your goal is to blow up everything on the play field (normal blocks included) by tactical bomb placement. Bombliss also has a puzzle mode, which is really addicting and worth playing. The game even lets you put in your initials and saves all your high scores to SRAM. All in all, I think Tetris 2 + Bombliss is a must-have for your Famicom collection. How do you get it? Well either track down an original copy of the cart (worth having), or perhaps
 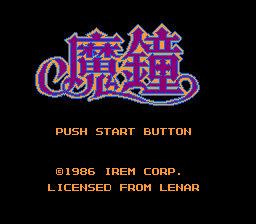 The last thing I have to report is a follow up on the couple
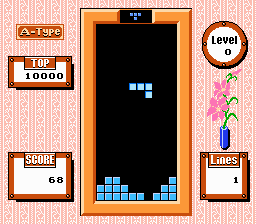
 [Editor’s Note: This article was written by Johnny as his first contribution to VC&G.]
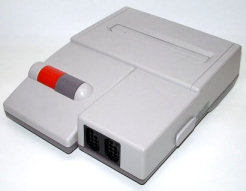 David the postman woke me up at the crack of dawn this morning (…11:00 AM…) with a special package delivery, shipped express from Japan. I quickly signed for it and dove into the box with earnest. Out popped a like-new condition
 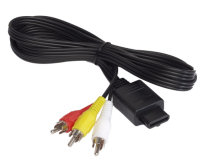 What rocks about it? Well, call me a weirdo, but I really love the fact that it has a standard Nintendo multi-AV socket on the back (hence the “AV” in “AV Famicom”). For your info, the cable that plugs into this type of socket is pictured on the left. There’s no RF-out here (the top-loading American NES has RF-out only) — just pure composite goodness. Yeah; I am quite aware (and happy) that the original NES has RCA audio and video outputs, but the standard AV jack on the AV Famicom means that I can have all four generations of Nintendo console units (Famicom, SNES, N64, and GC) sitting next to each other, and if I get tired of playing one console, I can simply unplug the AV cable from the unit and plug it into the back of another. Also, there’s the obvious reason that the video quality from a composite video output is superior to RF any day of the week. So that’s the video part. What else? Well, it plays Famicom games, and it plays them very well. It came with an AC adapter that works in US power outlets. And it has…get this…detachable controllers.
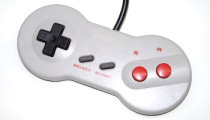 The original Famicom had built-in controllers. What’s more, the AV Famicom uses US NES-style controller ports, so you can use all your favorite NES control pads with the unit. I’m not sure if the light gun would work in port #2 though: the original Famicom’s light gun plugged into a special DB-15 accessory port on the front of the unit, and the AV Famicom replicates this port on the right-hand side, so I’m not sure if the AV’s port #2 wired to work properly with a US light gun. But I can’t talk about AV Famicom controller ports without mentioning the SNES pad-influenced “dog bone” controllers, which people either really love or…don’t really care. I’m a big fan of the original rectangular NES pads and don’t find them uncomfortable, so the dog bones tend to say in the closet. However, the AV Famicom iteself will be spared from the closet and instead will hold a special place in my entertainment center for years to come. If you have the cash and are serious about playing Famicom games on the real hardware, there’s no doubt about it: you should get an AV Famicom.
 You may have noticed on other gaming blogs that yesterday (Feb 21st, 2006) was the 20th anniversary of the first release of The Legend of Zelda on the Famicom. I’ve been playing The Legend of Zelda: The Minish Cap this week by coincidence (an excellent game, by the way), and all this confluence of Zelda activity has gotten me thinking. Wouldn’t it be awesome to play a massively multi-player online role-playing game (MMORPG) set in the Zelda universe? Perhaps Nintendo could make a spiffy, slick 3D one with nice graphics for their upcoming Revolution console. If not, I’d be happy if some fans simply made a homebrew 2D, top-down MMORPG using A Link to the Past as a graphical framework. Either way, there would be some serious questions to address in such a game.
 Here’s a quick gaming tip that especially applies to those of you with shoddy power companies. For years, it seemed my house would have power flashes at least a couple times a month. There was something about the power on my block that was especially unreliable (nearby transformers seemed to blow all the time), and it got really annoying. Naturally, I got