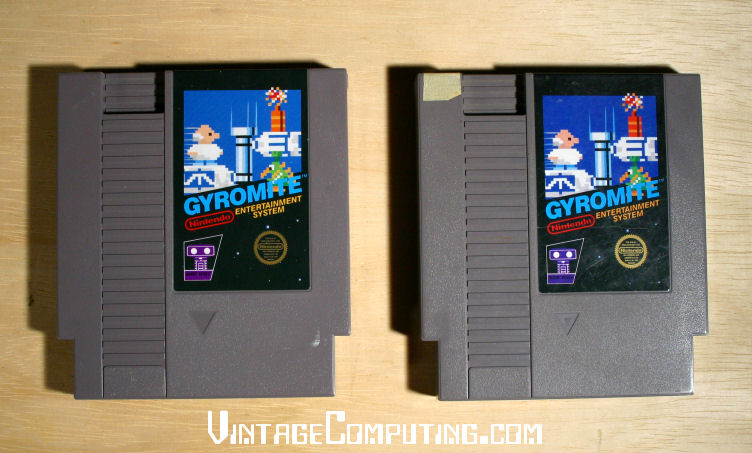
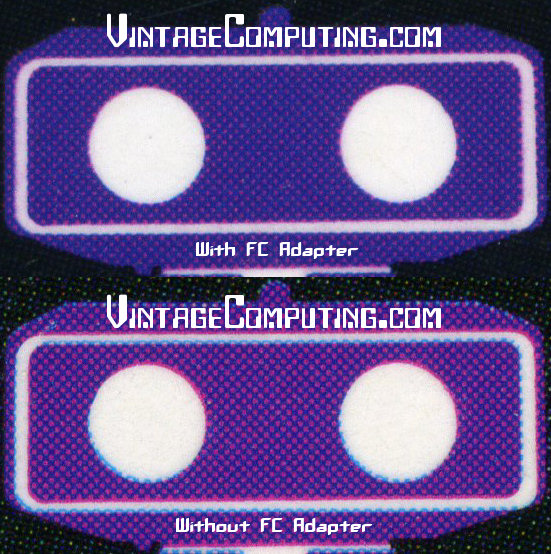
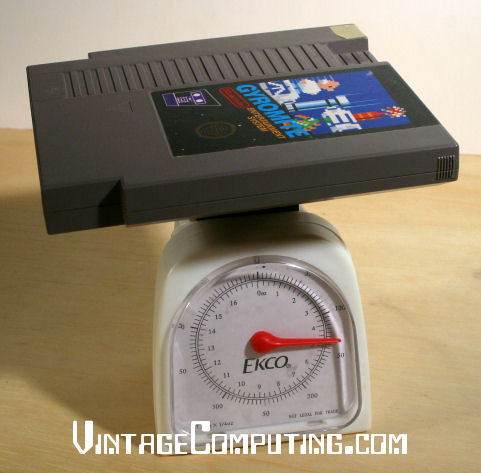
 In the VC&G article How to Tell if a Copy of Gyromite has a Famicom Adapter in it, I discussed how certain early NES game cartridges, especially Gyromite, have Famicom to NES converter boards built into them. Near the end of the entry I suggested that one could use such a board and an empty NES cartridge case to build a permanently-converted Famicom game for play on a regular American NES. Well, last week, I decided to actually do it. I chose a common Famicom game, the Japanese version of Super Mario Bros. 3 as my first guinea pig. There aren’t that many notable differences between the US and Japanese versions of SMB3, so this sort of game conversion would be better suited to a particularly good game that was never released in the US, or another game with more important differences between the US and Japanese versions. I don’t have that many Famicom games, so hence the choice.
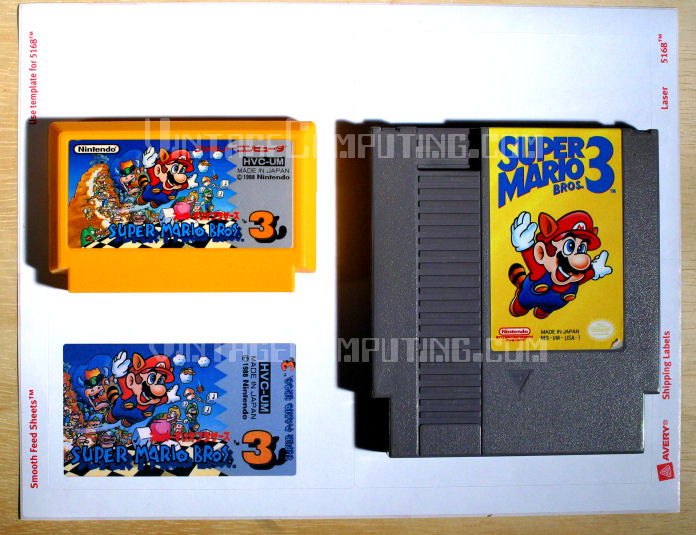
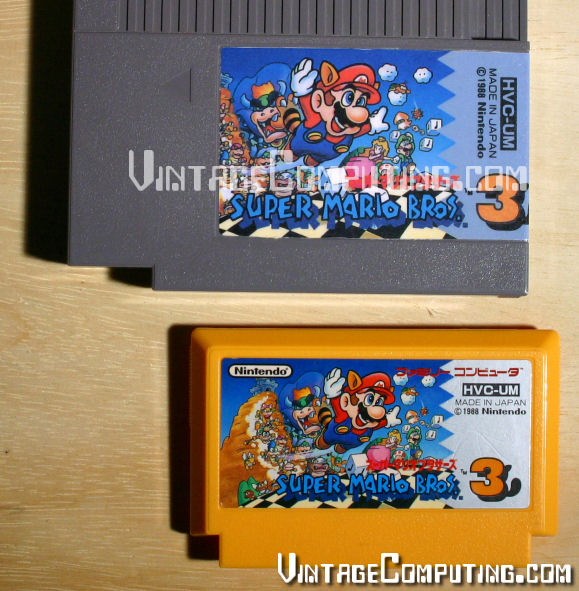
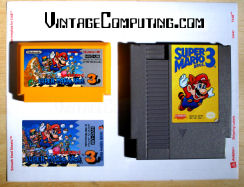 The project wouldn’t have been much of a project if I hadn’t made a custom label for the cartridge. That is the only step in such this conversion that required any serious labor (unscrewing screws isn’t that hard). First, I carefully measured the dimensions of a regular NES label (approximately 2.125″ x 3.8125″ to save you some time). Actually, I ended up using a second measurement in millimeters, but I forgot to write that down. Then, for the primary label artwork, I decided to scan the label of the Famicom SMB3 cartridge and start with that. I edited it in a number of ways, erasing some Japanese text that got in the way of my design, flipping a few things around, and making it fit regular NES label dimensions. I used a modified SMB3 logo from the game’s title screen for the title on the spine. After a few hours of tinkering, the label design was done. And for your notes, the final label is 650 by 1146 pixels at 300 DPI.
Next, I had to figure out what sort of adhesive paper I would actually print the label on. I happened to have some Avery 3.5″x5″ self-adhesive labels on 8.5″x11″ computer printable sheets lying around (Avery number 5168) that would do just fine with a little trimming. I also had some clear, self-adhesive laminate sheets lying around that would give my label a more professional glossy look. There are probably a million better ways to print a custom NES label with different materials, but I just used what I had on hand.
 I did some tests with regular paper first to make sure my label would fit. Then I set up the page margins to print the label properly on the Avery sheet and printed it out in a high quality photo mode on my ink-jet printer (nothing special at all — just an Epson Stylus Photo 820). Then I went to work removing the old label on the Gyromite cartridge. I have eight copies of Gyromite, so this was no big loss. The best tip I can give you for label removal is to use lighter fluid (naphtha). It works as a powerful solvent without damaging plastics — the adhesive on just about any label dissolves in it and then you can peel the label off, sometimes with no trouble. Squirt some on there, wait for it to soak in and slowly start peeling with your finger nail or a hard plastic tool (so you don’t scratch the case). An important thing to know is that you should immediately wipe up the lighter fluid and adhesive residue you get the label off. If the lighter fluid evaporates (and it evaporates pretty fast), the adhesive will be left behind and your cartridge will be sticky again. You want to get the cartridge clean and smooth for the new label you’re about to put on. Also, remember not to juggle flaming fire-sticks while doing this at the same time.
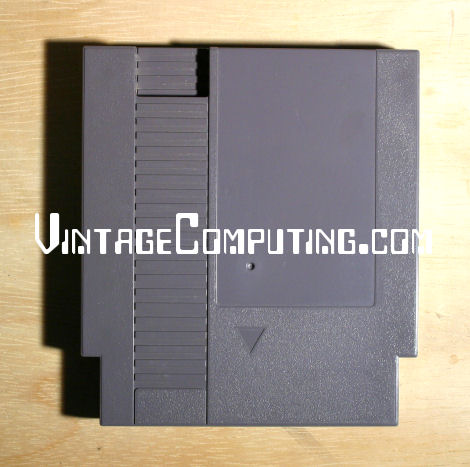
So, now we have a clean, young, blank and impressionable cartridge upon which to impart our new label. The next step in the label process, after applying a laminate over the printed Avery label, is to actually cut the NES label out of the bigger self-adhesive page you printed it on. You can use an X-Acto knife for accuracy, scissors if you’re impatient, or perhaps a guillotine-like paper cutter for straight edges. I did mine a little sloppily, which I regret. The rounded corners of the label are hard to cut out properly. Also, since my design had no bleed, (a printing term for an image purposely going outside of the designed cutting boundary) it was difficult to cut precisely along the label’s line without including any white (from the surrounding unprinted material) on the edges. My recommendation: if you have the luxury of designing big artwork that can bleed a bit off the edges, make it bleed and you’ll get a much better result when you cut it (sounds gruesome, doesn’t it?). Although with a bleed you’ll need to have either a NES-label-sized blank cutting template or a faint outline printed out on the label to tell you where to cut.
 Ok, enough of the cutting. After you have the final label, it’s time to apply it. Carefully peel off the backing from the self-adhesive label you’ve created, and start applying the label on one end (I chose the bottom of the recessed label space on the cartridge face), making sure to slowly, evenly, and firmly push the label down so you don’t get any waves, wrinkles or bubbles in the label. Also, the label will obviously have to bend around the cartridge from the spine to the face, or vice-versa, so be careful about that too.
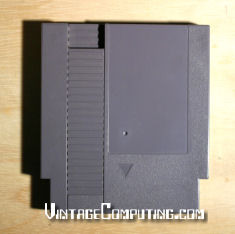
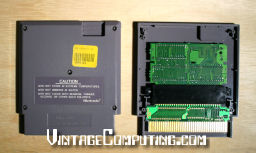
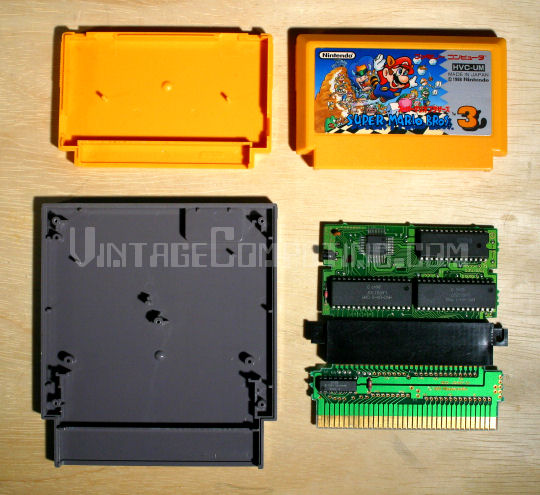
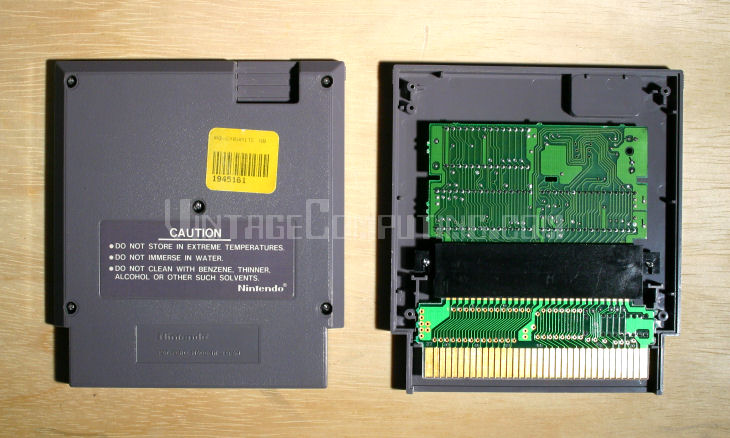
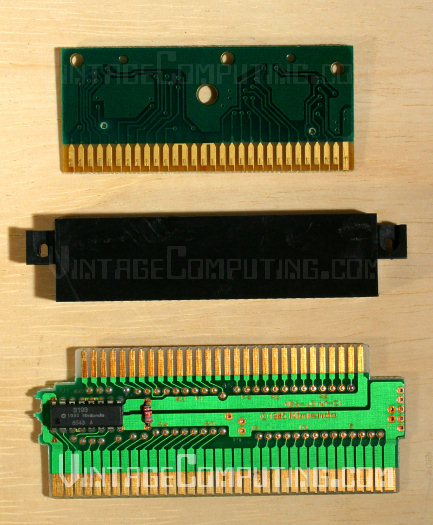
Once you’ve applied the label, you’re almost finished! Well, except for one very important detail: you actually have to get the game inside the cartridge to match your new label. Cracking open a traditional Famicom cartridge without breaking any plastic tabs is not easy (some don’t use any screws). I’m not even going to try to describe how to do it properly other than to say that there were four tabs locking into place on my Super Mario Bros. 3 Famicom cartridge: two at the top, and one on each side (see the picture for positions). Your best bet for dismantling a cart without breaking anything is to use a very flat, thin, but wide-bladed screwdriver to try to pry it open. If all goes well, then you can always change your mind and put the Famicom board back into the old case. If you break a tab, it will still hold together anyway. But if you accidentally rip the whole thing apart, then I guess it really will become a permanently converted Famicom game.
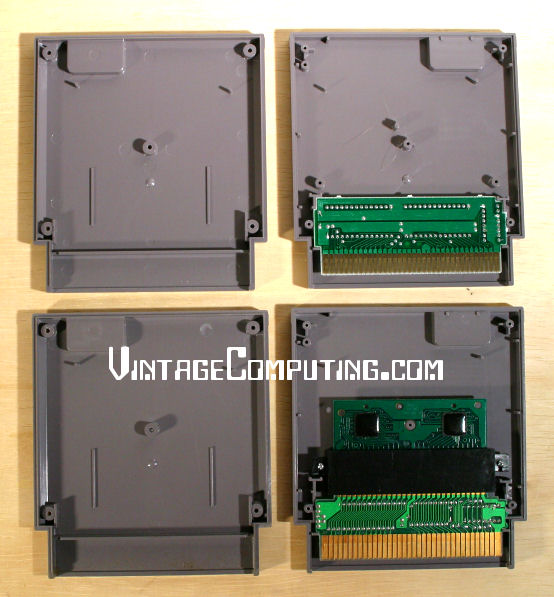
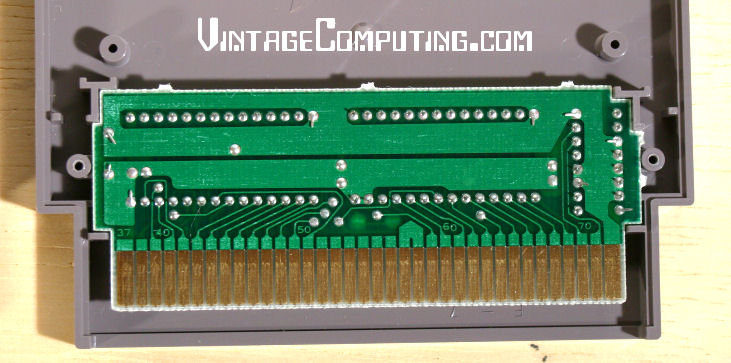
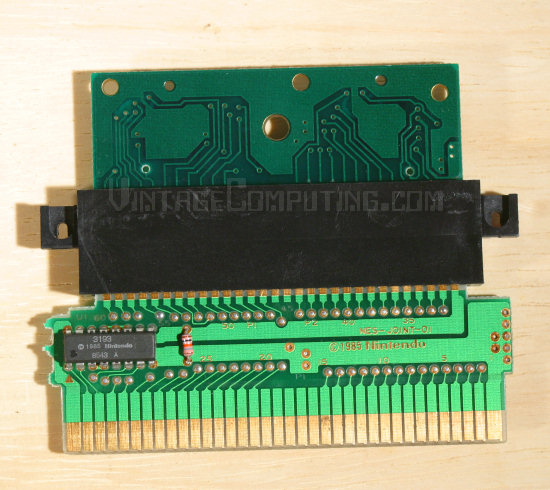
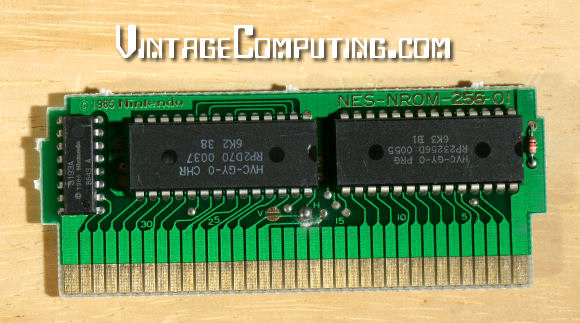
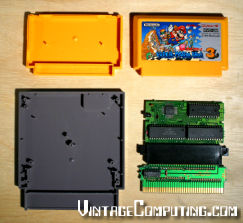 You will also have to disassemble your Gyromite cartridge (the one with the converter board in it). They typically have five screws that require a small, flat-bladed screwdriver for unscrewage (that should be a word). After that, you’ll have to unscrew the two screws that hold the Gyromite ROM board and adapter assembly down on the face half of the cartridge. Then, unplug the Gyromite ROM board from the connector on the top assembly and set it aside, feed it to your dog, or play it in your Famicom — we won’t be needing it anymore. Get some isopropyl rubbing alcohol and some Q-Tips (TM) and thoroughly clean the connectors of the Famicom game you’re converting. Also, give the connectors of the conversion board itself a good cleaning. Then plug your desired Famicom game’s board in where the Gyromite ROM board was. Be extra careful you have it in the right way: the former “front” of the Famicom board should be facing away from the front of the NES cartridge when you screw it back in. This is also a good time to test the assembly (if you have a top-loading NES) to make sure your game will work with the adapter and that everything is oriented the right way (hmm.. maybe we should have done this before making the label). I’ve accidentally put Famicom games in backwards before using the Gyromite converter and nothing blew up. So I guess that’s good news — if it doesn’t work, try flipping the board around.
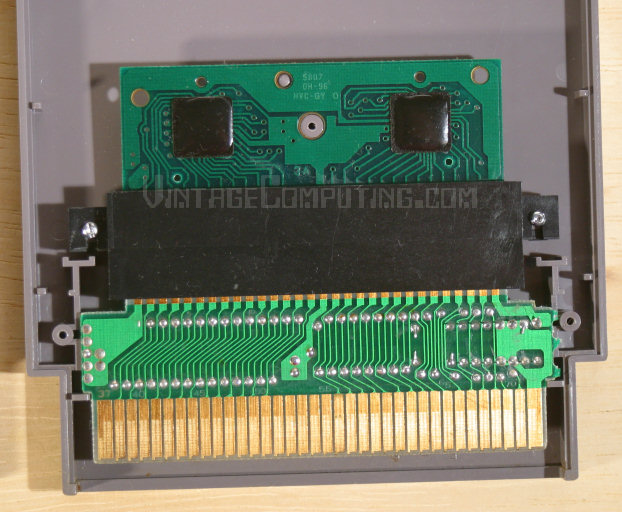
 Once you have the boards (game board and converter board) mated together properly, you may or may not have to remove two plastic posts from the center of the NES cartridge case to get it to fit. It all depends on how big your Famicom game’s PC board is. My guess is that you’ll probably have to do it anyway, as I did in the case of using SMB3. Various methods could be applied for proper post removal. One nice technique that comes to mind is to cut them off with a rotary cutting tool (like a Dremel). You could also snip them off with heavy gauge wire-cutters. But I didn’t feel like doing either, so I simply lit a butane torch, heated a screwdriver blade and melted the post off in a nice, clean, flat, and dust-free fashion (Kids, please try this at home). Don’t try to break the posts off by force or you might leave a nice round hole in the face of your NES cartridge (I tried the same thing back in 1991, with the aforementioned undesired results).
After plastic post removal (or PPR, as the pros call it) is successful, put your new game-converter assembly into the cartridge and screw it in with the original screws that once held the Gyromite assembly in place. Then put the back on the cartridge and screw that down as well, also with the original screws, EXCEPT — do not attempt to screw the middle/center screw in the back of the cartridge. Since you previously cut the receiving post for that screw off, it is no longer there, and in its place is a Famicom game board that could easily be damaged if you try to force a screw through the hole. Having done that successfully, the game is now in one piece and ready to play. Try it out and have fun! Let me know how it goes.
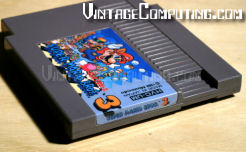
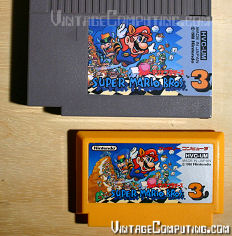
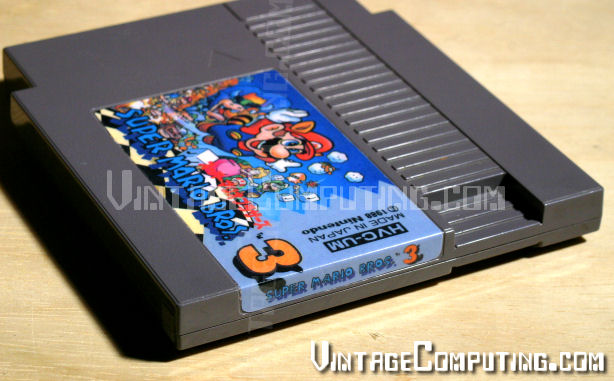
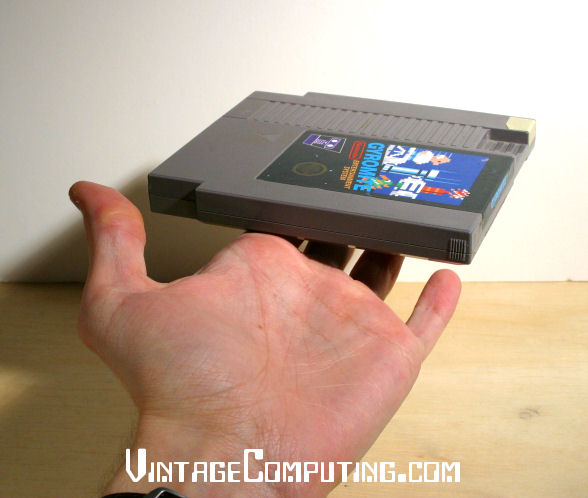
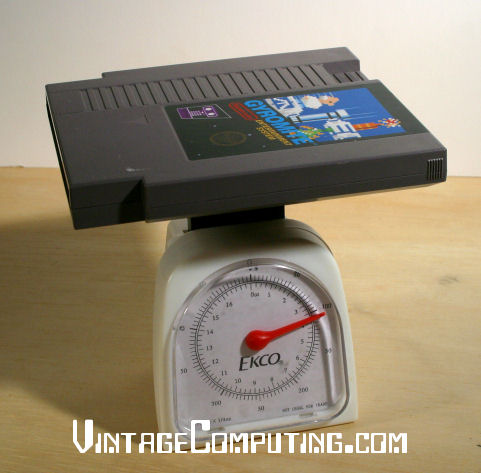
The final Super Mario Bros. 3 Japan cartridge for the NES! Sorry about all the watermarks on the images — if I didn’t do it, some hoodlum would be trying to sell an ultra-rare alternate SMB3 cartridge prototype on Ebay tomorrow.
Update (09/28/2006): To download the actual label graphic that I made for the Japanese version of Super Mario Bros. 3, click here.
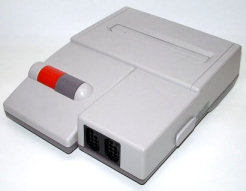 David the postman woke me up at the crack of dawn this morning (…11:00 AM…) with a special package delivery, shipped express from Japan. I quickly signed for it and dove into the box with earnest. Out popped a like-new condition AV Family Computer (Famicom) console with two “dog bone” control pads, one A/V cable, an AC Adapter, and 18 games! Yes; I was quite excited. But of course, people don’t just randomly ship like-new AV Famicoms to your doorstep. Nope — it takes some form of coercion (hopefully peaceful, like money) to get that to happen. I’ll admit: I bought it off of eBay, and perhaps paid a tad too much for it, but I am very happy with my purchase. During the whole Generation NEX fiasco, many VC&G readers were talking about how much the AV Famicom rocks. And after playing with it some today, I would have to second that emotion.
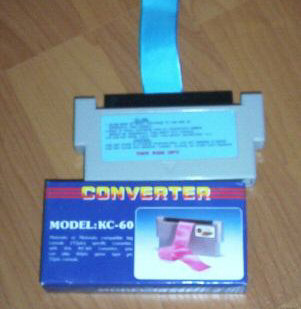
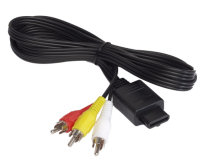 What rocks about it? Well, call me a weirdo, but I really love the fact that it has a standard Nintendo multi-AV socket on the back (hence the “AV” in “AV Famicom”). For your info, the cable that plugs into this type of socket is pictured on the left. There’s no RF-out here (the top-loading American NES has RF-out only) — just pure composite goodness. Yeah; I am quite aware (and happy) that the original NES has RCA audio and video outputs, but the standard AV jack on the AV Famicom means that I can have all four generations of Nintendo console units (Famicom, SNES, N64, and GC) sitting next to each other, and if I get tired of playing one console, I can simply unplug the AV cable from the unit and plug it into the back of another. Also, there’s the obvious reason that the video quality from a composite video output is superior to RF any day of the week. So that’s the video part. What else? Well, it plays Famicom games, and it plays them very well. It came with an AC adapter that works in US power outlets. And it has…get this…detachable controllers.
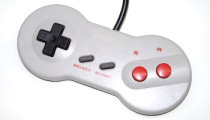 The original Famicom had built-in controllers. What’s more, the AV Famicom uses US NES-style controller ports, so you can use all your favorite NES control pads with the unit. I’m not sure if the light gun would work in port #2 though: the original Famicom’s light gun plugged into a special DB-15 accessory port on the front of the unit, and the AV Famicom replicates this port on the right-hand side, so I’m not sure if the AV’s port #2 wired to work properly with a US light gun. But I can’t talk about AV Famicom controller ports without mentioning the SNES pad-influenced “dog bone” controllers, which people either really love or…don’t really care. I’m a big fan of the original rectangular NES pads and don’t find them uncomfortable, so the dog bones tend to say in the closet. However, the AV Famicom iteself will be spared from the closet and instead will hold a special place in my entertainment center for years to come. If you have the cash and are serious about playing Famicom games on the real hardware, there’s no doubt about it: you should get an AV Famicom.
 Ah…the trusty Goodwill store. Once the last bastion for countless old computers thrown out by a thankless middle-class America that had grown tired of them, it’s now merely a graveyard for broken VCRs and 1970s-era crockpots (you can always find at least one crockpot at any Goodwill store). So what happened? Around 2001, if I recall correctly, GCF was choking at the gills with hordes of truly worthless PC-clones that no one ever bought. They kept pouring in, non-stop, stacking up at the back of every store. The only thing
  Paperback books cost fifty cents a piece; hard cover books, one dollar. That’s where I found the first edition of “The Media Lab” by Steward Brand (1987), hardcover and in great condition. This is a really cool find — an excellent addition to my computer history library — at a great price. It’s fun to see what was considered futuristic even as recently as 1987. The book has a great picture section in the middle (Grog no like words, Grog like piktures!), which, since I haven’t actually read the book yet, will have to suffice for a source of a description of the book. There are examples of early computer illustration software, rudimentary 3D computer graphics, anti-aliasing for digital text, force-feedback joysticks, holograms, AI, and something called NewsPeek, which was an idea for an electronic newspaper with eerie echos of the World Wide Web before such a thing existed. If it deals with computers and media, the MIT lab did it all first. And, if I may add personally, they also repeatedly failed to capitalize on their discoveries first, a ridiculous flaw of many a government and corporate think-tank and R&D division over the years (Xerox PARC comes to mind). “But RedWolf,” you say, “That’s not the purpose of a research institution!” I don’t care. Many incredible inventions are made at university labs, but it always takes a maverick separatist entrepreneur to break off from the organization and bring the benefits of those inventions to the masses. Otherwise, great ideas would stagnate there forever, and die on the vine where they were grown. Until new technologies are actively pushed and available in the marketplace, they’re just academic play-toys that don’t help anybody, hoarded by elitist engineers. So am I criticizing academic and big organization research? Hell yes. But hey, that opens up another can of worms, and I think it’s time to eat lunch.
 I’m convinced that computers make the worst monetary investment of a physical item in history, continually going obsolete and losing 95% of their value in just a few years. As a result, I’ve spent most of my money on things that are now near-worthless. This sort of situation is probably unique in the history of mankind if you think about it. If I want some quick cash, I can’t just sell my computer that I paid $2000 for a year ago to get $2000, or even $1000. Not only since it’s used, but since it’s yesterday’s news that it is now worth bupkis. Contrast this to buying a used car for $2000. Take good care of it, and it’s probably still worth about $2000. Or real estate, which only seems to rise in value over time (unless the neighborhood goes to hell). Or, heck — even a table. You can buy one for $20 at a yard sale. It works. You use it. You can sell it for $20 if it still does its function. Nobody has come out with a “Super Table 2000” that has completely obsoleted your make and model of table. No — we who love computers pour our hard-earned dollars into elaborate gadgets that lose all their physical value in no time. I bought an iPod in 2003 that cost $400, now I’d be hard-pressed to get $50 for it on Ebay. And all these Palm and Windows CE PDA palmtop whatevers.. they’re all $500 to $1000 one year, and the next you can’t sell them for more than $100 (Thus making them, along with other dedicated gadgets like cell phones and iPods, even worse “investments” than computers).
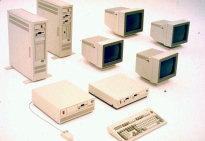 So here I am, years later, after spending thousands upon thousands on miscellaneous computers and electronic do-hickeys. I need to drum up some cash. The first thing a traditionalist would say is, “Why not sell what you’ve bought and make some money?” Well, I look around. Gee, don’t I have anything worth anything? What the hell happened to that ten grand I spent over the last five years? I can’t see it anywhere. I look all over the house.. it’s just not there anymore. It has vanished like money poured into a deep, deep hole. Computers are a great way to destroy value. It’s not like what my dad could do with his camera collection, circa 1970-1990. If he wanted a new camera for his collection, he’d just sell his old ones (for about as much or more than he paid for them) to make enough money to buy a new one (of course my dad’s camera collection is becoming obsolete thanks to digital cameras and rapidly losing value, but for over 80 years the technology was basically the same). But it’s more trouble than it’s worth to sell any of my old electronic devices. They’re worth more to me to have them and play with them than the $10 I can make by selling them. And that’s why it’s so easy to collect them. Nobody wants them, they’re useless to people now, and they just take up space. And that’s about when they end up taking up my space instead of theirs, for little or no cost to myself. Initial cost, anyway.